Lately I have been seeing so many people sharing their photos but with a paper folding effect. This effects makes their pictures look as if they were printed on a paper and the paper was first folded down three-four times and then it was straightened out. The creases made by folding the paper are visible in their pictures.
So how do you add this effect to your own photos before you share them publicly. We can do this easily using Paint.net – a freeware image editor for Windows.
- First of all download and install Paint.net from https://www.getpaint.net/download.html.
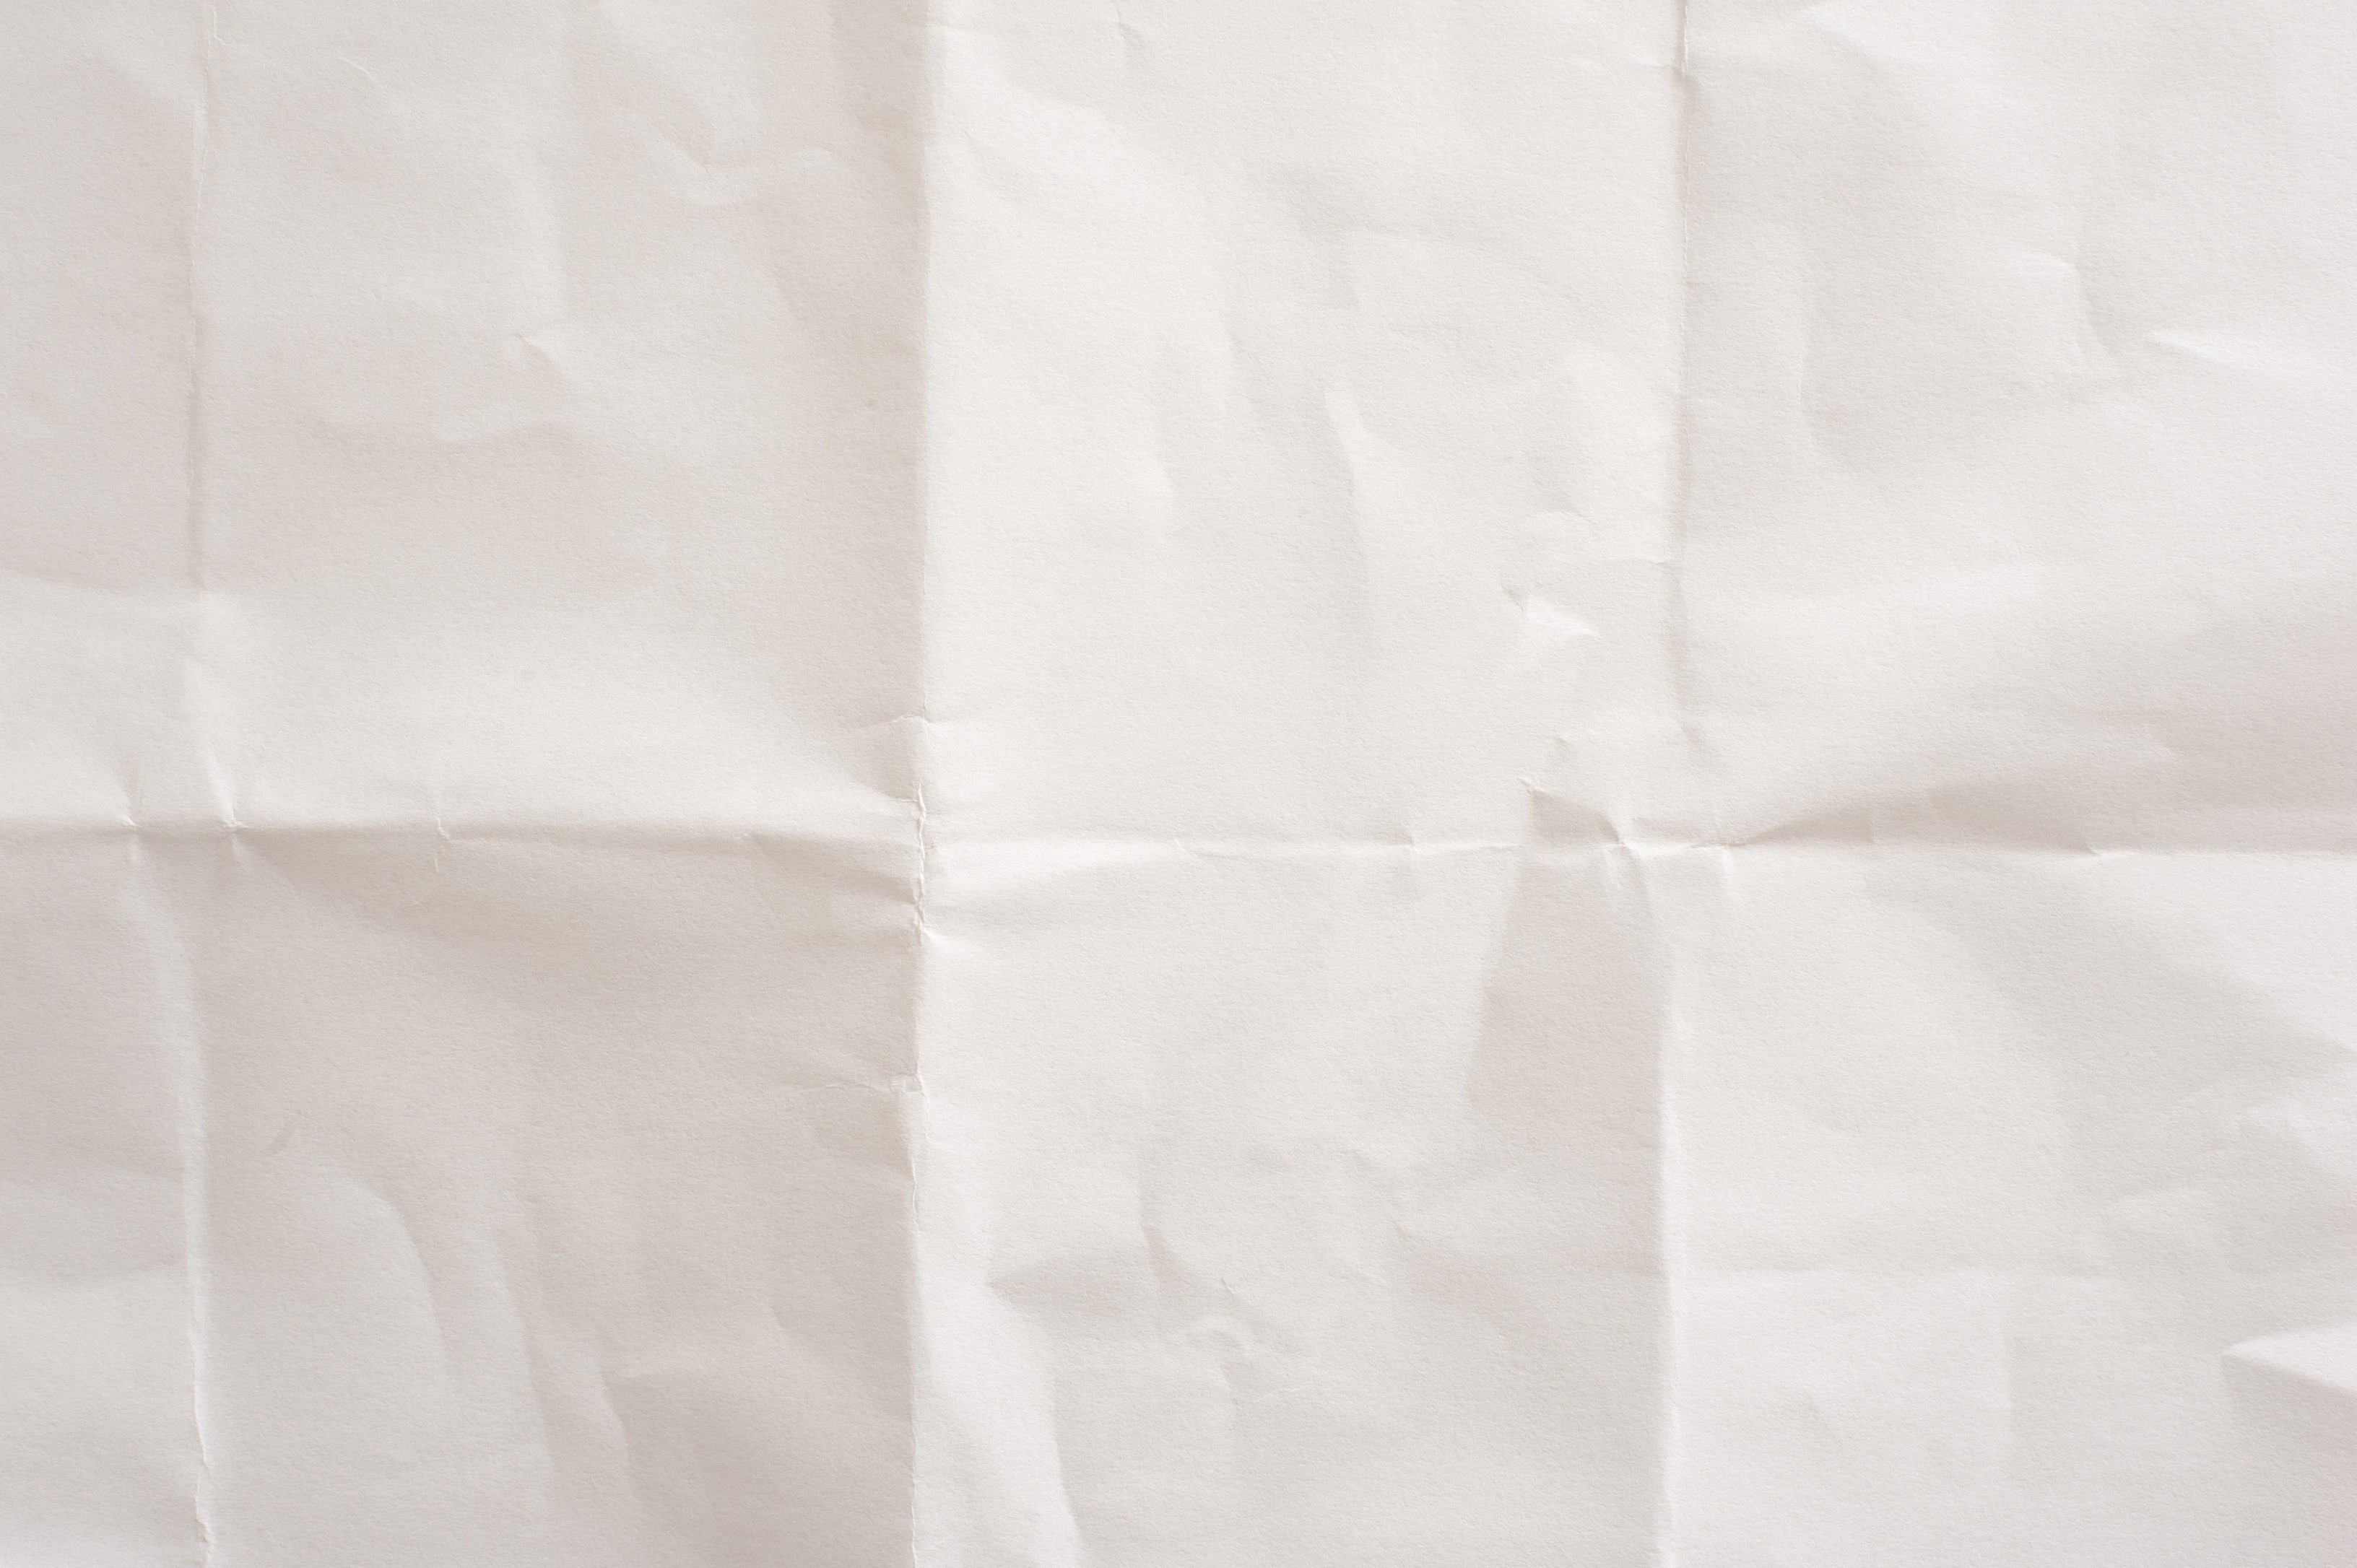
- Download the image of blank paper with folding creases from https://creativity103.com/collections/Paper/paper_creases.jpg. You can also fold a paper yourself and use your camera to take its picture for use.
- Open the downloaded image in Paint.net
- Select Layers and then Import from File from the menubar. Choose the picture that you want to add paper folding effects to.

- If needed, resize both the layers to the same size by dragging the new layer by its corner.
- Select the second layer, press F4 and select opacity to be 200 and blend mode to be Multiply.

- Now you have added paper folding effect to your picture. You can export it to a JPEG image and share with your friends.
The same method can be used with any other image editor that supports layers like GIMP. You can use a shiny paper fold it and take its picture if you want that shiny glossy paper folding effect. You can experiment with various settings to see which ones work the best for you.
One benefit of adding this effect to the photos before sharing them over social networks is that nobody can just copy them and abuse them as the creases are visible. Some people are saying that this is better than even the good old watermarking.